Sooooo I've sat at the computer and tried to decide what I was going to blog about, and all the ideas I had went straight out the window...
Ah well, tomorrow is another day.
100 Things to Put on a Charcuterie Board
3 years ago
Sooooo I've sat at the computer and tried to decide what I was going to blog about, and all the ideas I had went straight out the window...
Ah well, tomorrow is another day.
As I was looking at my cricut cartridges, I notice that most have tags you can cut out. I plan to make tags for christmas (PLAN to! make that note.) I decided to try it out first and see how I liked it. Then I came up with this brilliant idea. I was going to put the tags on my stars since I didn't want to repaint them.

All I did was cut out 4 inch tags with my Jubilee cartridge. I cut out another 3 1/2 inch tag and cut the top off to glue in the middle.
I had bought this little alphabet stamp set for a dollar at Roberts the other day. I used a black ink pad and stamped what I wanted onto the tag itself. The red one doesnt have any sayings since it was too dark for the ink LOL


Easy and cheap!
Did you know that Home Depot sells their scrap wood for 51 cents? What a stinkin deal. And since I work at the big orange box I come across these deals pretty frequently. Like these blocks! They were selling 3 for 51 cents and scooped them up as soon as I saw them.

This project is easy peasy. All you need is:


My mom found this chalkboard while we were organizing and set it aside for the kids to draw on. I didn't realize that until AFTER I redid it, but it turned out cute!
This was color of the wood before...

Anyway, so this was quite the exciting project when it came down to it. Why you ask? Because I messed up big time. I made my way to one of my favorite stores: Roberts. Ask my hubby, he says I'm there everyday (im not... really, well... maybe). I had the perfect paint color in my mind and went to the browns to pick it out. I had found it! A nice dark mocha like brown. The name of the color was Burnt Carmine. I had no idea what carmine is, but it sounds brown right? Nope. Carmine is a deep red! So what does "Burnt Carmine" mean? PURPLE!

Not the color I had planned.
This is the bottle and how it deceived me...

Doesnt that look BROWN?!?

The lighting in the store was oh so deceiving. So I took a medium brown, mixed it with this color and ended up with this:
 \
\
I thought it turned out cute.


Usually it's wordless Wedensday but I couldn't resist. This is what I found in my bowl the other day making eggs.

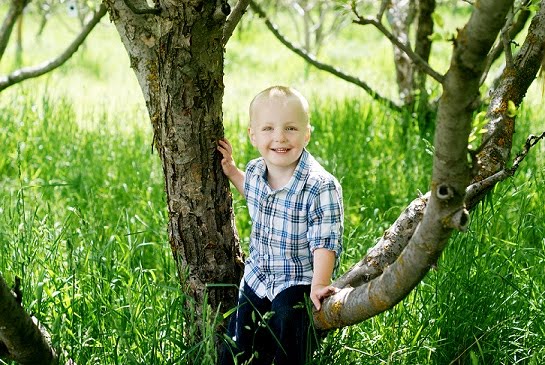
This is the one hobby that I will always enjoy. Photography lets me express myself in ways that I could never do otherwise. There's nothing like molding a picture into something amazing, well, at least amazing to me. I still suprise myself everyday with what comes out of my camera...
This little guy was one of those obstacles that you don't realize scare the crap out of you until you're faced with it. I had always admired the pretty newborn pictures photographers take. But I didn't know if I could do it. I was nervous. But since the opportunity presented itself when my cousin in law had her baby I had to take the chance. I think they turned out beautifully! I'm no professional, but I am PROUD!
Here is Mr. Ruger.


Two years ago today, I gave birth to the most beautiful baby boy.
I went 9 days over my due date, and was finally induced. It took me 32 hours in the hospital, sausage toes, and a c-section to finally hold that little guy in my arms.
39 weeks


This little guy came out a whopping 9 lbs 12 oz and 20.5 inches long.


It was the most amazing feeling holding him in my arms for the first time. And he was so heavy!


Oh, did I forget to show you my sausage toes?

This little boy has grown up so much in the passed 2 years! He amazes me everyday.

He sings, he dances (oh boy can he dance), he laughs, he cries, and he can throw the meanest, baddest temper tantrum around.
I couldn't ask for a better son. He makes me laugh so hard, and the things he says are so funny.
Happy Birthday Cason!!!!
We had his party a week earlier since we couldnt book the church this weekend. He had a blast!
Here are some decorations I made for him. Our theme was a color theme of Browns, Greens, and Blues!


We had a popcorn and cotton candy machine. It was such a mess for my hubby!


And of course the birthday boy! When I ask him to say cheese, he arches his back and smiles real big. I love it.


His big boy bike!

I saw these ornaments at the Dollar Tree the other day while getting wrapping paper. Metal stars are a big decorating thing right now and I couldn't pass them up! I bought 4, decided I was going to spray paint 3 and mod podge the other one for christmas. I think they turned out cute!!!
*NOTE: The metal is what you pay for, pretty flimsy, but for a buck, you cant complain*
BEFORE

AFTER

At first I was going to place it here:

But decided otherwise


And of course had to snap one of my cute boy before I woke him up!

I wanted to make something special for Cason's birthday. I was thinking about having them sign something when I stumbled upon this album that was 40% off! 2 dollars later and I was left staring at it, wonder what the heck to do. I had never done one before (even though I have 4 or 5 I planned on using), so I got to work!
The empty spaces are where I will put his pictures from his party. The last page I am placing a quote, but I was out of ink! I am proud of it :)